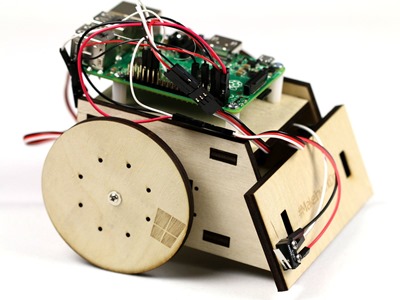
My 7 year old sat down and built a little robot from instructions listed at Microsoft's IoT Hackster site.
To build the robot, you will need the following:
- Wooden Robot Frame in 7 pieces - Get the cutting plans from the Sumo Robot Jr. GitHub repo and submit them to http://ponoko.com. They cut them 4 to a sheet of P3 5.2 mm Veneer Core Birch
- 2x continuous rotation servos, like these
- A ball caster, like this for the front "wheel."
- A USB Xbox 360 Controller
- A Digital switch, like this. You can actually skip this if you want to, it's not require just to move the robot.
- 6x 6" Male-to-Female Wires (2 red, 2 white and 2 black) like these
- 2x 6" Female-to-Female Wires (1 red and 1 black) like these
- Screws, Nuts, Bolts and standoffs like this. This was a little bit of a challenge for us, as the screws I got for the axels of the wheels weren't long enough. You may need to make a few short trips to your local hardware store.
- Raspberry Pi 2, a 2 Amp power supply, SD card, network Ethernet cable. I actually ended up using a portable battery that I use to charge my phone.
- Micro screwdrivers
Starting with a Raspberry Pi 2, walk through the setup instructions here. You do need to have a Windows 10 today to installing Windows 10 IoT Core but at least it's gotten a lot easier with the latest build for IOT. There's an app that does all the work and you don't need to go to the command line. Also get Visual Studio 2015 Community and the Windows IoT Core Project Templates. Basically just follow these step-by-step instructions.
Once you have the Raspberry Pi 2 loaded and you've got VS, the code for the robot is here on GitHub. The instructions don't include a photo with pinout information, so someone else who completed the project took pictures of the correct orientations for pins.
A few things about Windows 10 IoT Core on small devices like this. It's NOT "desktop Windows." It's not full Windows with a Store and Office. You CAN run Universal apps and they can have a UI. In fact, the robot app can run on your PC and control the robot remotely, OR it can run the same app on the Raspberry PI and control it from there.
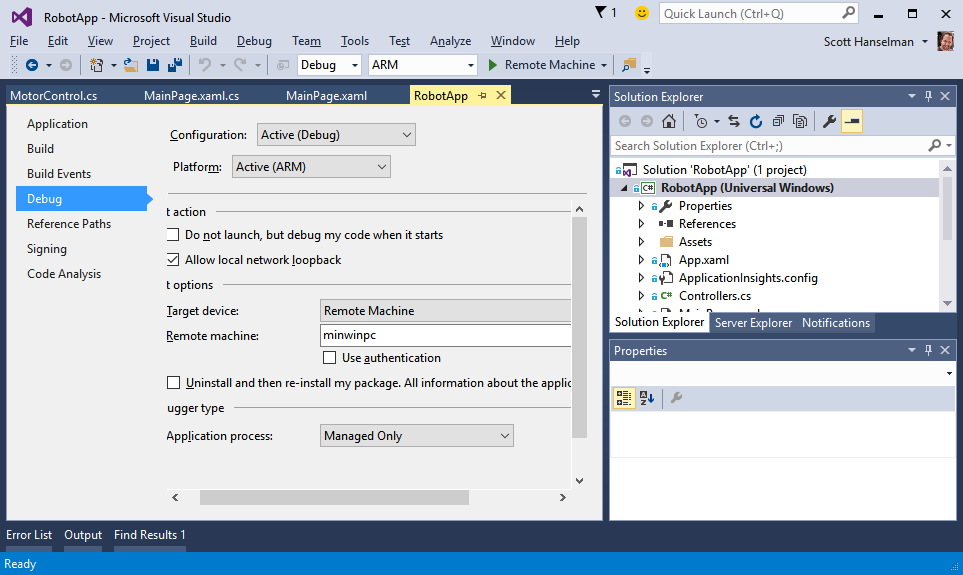
Here in VS2015 you can see under Debug the name of my Raspberry PI ("minwinpc") and that I'm targeting it remotely and as an ARM device.

I was having so much fun working on assembling this that after the kids went to bed I did a 30 min Google Hangout/YouTube and demonstrated the whole thing. You can watch that here, below. Please also take a moment and subscribe to my YouTube Channel.
Check out http://microsoft.hackster.io and http://idevthis.azurewebsites.net/ for more projects, code, and inspiration. Have you built anything?
SOCIAL: Hey folks, please do follow me on Facebook https://fb.me/scott.hanselman or Twitter! https://twitter.com/shanselman
© 2015 Scott Hanselman. All rights reserved.


